


-Assembly instructions
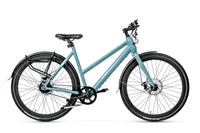
1.Cruiser/Cruiser pro assembly instructions
NOTICE: The following assembly steps are only a general guide to assist in the assembly of your Magicycle Bike and is not a complete or comprehensive manual of all aspects of assembly, maintenance and repair. We recommend you consult a certified bicycle mechanic to assist in the assembly, repair and maintenance of your bicycle. For detailed instructions please view the Magicycle Cruiser/ Cruiser Step-thru Assembly video.
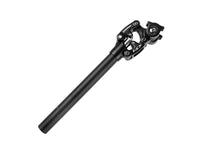
Step 1: Install the handlebars. Remove the four screws from the stem, ensuring the linear markings on the handlebars are centered and handlebars are adjusted to the comfortable position. Finally, tighten the screws with the assembly tool.
Step 2: Install the headlight. Use a socket wrench to hold the nut and loosen the screw with a inner hexagon wrench and remove the screw. Install the screw pass through headlight and the bracket and adjust the headlight properly for riding conditions.
Step 3: Install the front fender, clamp the nut with a socket wrench, loosen the screw with an Allen wrench and remove the screw. The mounting screws pass through the headlight bracket and the front fender bracket, and use an Allen key to fix the screws of the front fender and the front fender bracket.
Step 4: Install the front wheel. Remove the plastic front fork guards from the front wheel being sure not to touch the brake rotor set. Open the quick skewer and remove the thumb nut and cone spring. Carefully lower the fork and ensure the brake rotor goes into the caliper. Next align the dropouts with the axle of the wheel hub to make sure the fork dropouts are fully seated on the axle. Install the quick skewer starting from the brake rotor side of the wheel and then push quick release skewer through the hub. Keep two cone springs pointed towards the wheel hub. Tighten the thumb nut until the quick release lever is held in line with the axle, and then use your palm of your hand to close the quick release skewer.

Step 5: Use a bike pump with a press gauge to inflate tires to desired KPA. The recommended pressure for this mode is 40 KPA. Do not over inflate or underinflate tires.
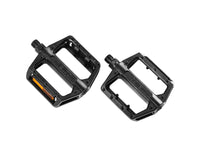
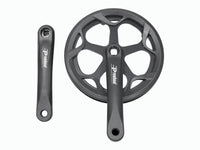
Step 6: Install the pedals. The left and right pedals are marked on both ends. First, install the right pedal by tightening the pedal in clockwise direction. The left pedal is tightened by turning the pedal in counterclockwise direction. Both pedals should be tightened to 35 Newton meters by using a torque wrench.

Step 7: Adjust the saddle height loosen the seat clamp, remove the seat post and ensure the seat clamp is centered over the hole in the seat tube. Insert the seat post into the slot, adjust the saddle height to a suitable height and tighten the adjustment nut When you feel resistance, close the seat tube clamp fully.
Step 8: Adjust the seat position forwards or backwards. Use a alien wrench to loosen the seat adjustment bolt and make sure to stay within the marked adjustment range.
Step 9: Check whether the battery pack is locked into the frame of the Magicycle Cruiser / Cruiser Step-thru When you want to take off the battery insert the key and turn to release the battery pack. The battery pack can be removed and charged separately. This is the charging port. Align the battery pack to the battery holder carefully and push until when you hear it click into the place.
NOTICE: Ensure all hardware is tightened properly and all safety checks in the following sections are performed before first use. Contact Magicycle Bike if you have any questions regarding the assembly of your bike. If you are not able to ensure all the assembly steps in the assembly video are performed properly, or you are unable to view the assembly video please consult a certified local bicycle service provider for assistance in addition to contacting Magicycle Bike After-Service for help.
2.Ocelot/Ocelot Pro assebly instruction
NOTICE: The following assembly steps are only a general guide to assist in the assembly of your Magicycle Bike and is not a complete or comprehensive manual of all aspects of assembly, maintenance and repair. We recommend you consult a certified bicycle mechanic to assist in the assembly, repair and maintenance of your bicycle. For detailed instructions please view the Magicycle Ocelot/ Ocelot Pro Assembly video.
Step 1: Install the front wheel. Remove the plastic fork guard lever from the fork, making sure not to touch the brake caliper set. Put the front wheel into the front fork and make sure that the front wheel hub goes into the fork dropout, the brake disc goes into the caliper, and unscrew the quick release nut and conical spring to install the quick release lever from the left side of the wheel, then put the quick release lever Insert the front wheel hub, keeping the two conical springs pointing towards the hub, tighten the quick release nut until the quick release lever is flush with the outside of the quick release nut, make sure the front wheel hub is fully seated on the bottom of the fork dropout slot without a gap, then lock the quick release handle upwards.
Step 2: Install the front fender, clamp the nut with a socket wrench, loosen the screw with an Allen wrench, and remove the screw. The mounting screws pass through the front fender bracket and use an Allen key to fix the screws of the front fender and the front fender bracket.
Step 3: Install the handle. Remove the 4 cover plate locking screws from the seat tube, make sure that the center drum knurl on the handlebar is in the middle of the seat tube, and adjust the handlebar to a comfortable position. Finally, tighten the screws with the assembly tool.
Step 4: Install the pedals. The left and right pedals are marked L left R right on both ends. First, install the right pedal by tightening the pedals clockwise, and tightening the left pedal by turning the pedals counterclockwise. Both pedals should be tightened to 35 Nm using a torque wrench.
Step 5: Use a bike pump with a press gauge to inflate tires to the desired KPA.
Step 6: Adjust the saddle height. Loosen the seat tube clip with an Allen key, remove the seat tube and make sure the clip is centered on the hole on this tube. Insert the seat tube into the middle tube of the frame, adjust the saddle height to a suitable height, (be careful not to leak the safety wire on the seat tube) and tighten the adjustment nut.

NOTICE: Ensure all hardware is tightened properly and all safety checks in the following sections are performed before first use. Contact Magicycle Bike if you have any questions regarding the assembly of your bike. If you are not able to ensure all the assembly steps in the assembly video are performed properly, or you are unable to view the assembly video please consult a certified local bicycle service provider for assistance in addition to contacting Magicycle Bike After-Service for help.
3.Jaguarundi assembly instruction
NOTICE: The following assembly steps are only a general guide to assist in the assembly of your Magicycle Bike and are not a complete or comprehensive manual of all aspects of assembly, maintenance, and repair. We recommend you consult a certified bicycle mechanic to assist in the assembly, repair, and maintenance of your ebike. For detailed instructions please view the Magicycle Jaguarundi assembly video.
Step 1: Install the front wheel. Remove the plastic fork guard lever from the fork, making sure not to touch the brake caliper set. Put the front wheel into the front fork and make sure that the front wheel hub goes into the fork dropout, the brake disc goes into the caliper, and unscrew the quick release nut and conical spring to install the quick release lever from the left side of the wheel, then put the quick release lever Insert the front wheel hub, keeping the two conical springs pointing towards the hub, tighten the quick release nut until the quick release lever is flush with the outside of the quick release nut, make sure the front wheel hub is fully seated on the bottom of the fork dropout slot without a gap, then lock the quick release handle upwards.
Step 2: Install the front fender, clamp the nut with a socket wrench, loosen the screw with an Allen wrench, and remove the screw. The mounting screws pass through the front fender bracket and use an Allen key to fix the screws of the front fender and the front fender bracket.
Step 3: Install the handle. Remove the 4 cover plate locking screws from the seat tube, make sure that the center drum knurl on the handlebar is in the middle of the seat tube, and adjust the handlebar to a comfortable position. Finally, tighten the screws with the assembly tool.
Step 4: Install the pedals. The left and right pedals are marked L left R right on both ends. First, install the right pedal by tightening the pedals clockwise, and tightening the left pedal by turning the pedals counterclockwise. Both pedals should be tightened to 35 Nm using a torque wrench.
Step 5: Use a bike pump with a press gauge to inflate tires to the desired KPA.

Step 6: Adjust the saddle height. Loosen the seat tube clip with an Allen key, remove the seat tube and make sure the clip is centered on the hole on this tube. Insert the seat tube into the middle tube of the frame, adjust the saddle height to a suitable height, (be careful not to leak the safety wire on the seat tube) and tighten the adjustment nut.
4.Cummuter assembly instruction
NOTICE: The following assembly steps are only a general guide to assist in the assembly of your Magicycle Commuter and is not a complete or comprehensive manual of all aspects of assembly, maintenance and repair. We recommend you consult a certified bicycle mechanic to assist in the assembly, repair and maintenance of your bicycle. For detailed instructions please view the Magicycle Jaguarundi assembly video.
Step 1: Install the front wheel. Remove the plastic fork guard lever from the fork, making sure not to touch the brake caliper set. Put the front wheel into the fork and make sure the front wheel hub goes into the fork dropout and the brake disc goes into the caliper, next align the fork tines with the axle of the hub to make sure the fork tines are fully seated on the axle. Unscrew the quick-release nut and conical spring to install the quick-release lever from the left side of the wheel, then insert the quick-release lever into the front wheel hub, keeping the two conical springs pointing towards the hub, tighten the quick-release nut until the quick-release lever and The outside of the quick release nut is flush, make sure that the front wheel axle is completely placed on the bottom of the slot of the front fork dropout, and then firmly tighten the quick release handle upwards.
Step 2: Install the front fender, clamp the nut with a socket wrench, loosen the screw with an Allen wrench and remove the screw. The mounting screws pass through the front fender bracket and use an Allen key to fix the screws of the front fender and the front fender bracket.
Step 3:Install the handle. Remove the 4 cover plate locking screws from the seat tube, make sure that the center drum knurl on the handlebar is in the middle of the seat tube, and adjust the handlebar to a comfortable position. Finally, tighten the screws with the assembly tool.

Step 4: Install the pedals. The left and right pedals are marked L left R right on both ends. First, install the right pedal by tightening the pedal inclockwise direction. The left pedal is tightened by turning the pedal in counterclockwise direction. Both pedals should be tightened to 35 Newton meters by using a torque wrench.
Step 5: Use a bike pump with a press gauge to inflate tires to desired KPA.

Step 6: Adjust the saddle height. Loosen the seat tube clip with an Allen key, remove the seat tube and make sure the at clip is centered on the hole on this at tube. Insert the seat tube into the middle tube of the frame, adjust the saddle height to a suitable height, (be careful not to leak the safety wire on the seat tube) and tighten the adjustment nut.
5.Deer assembly instruction
NOTICE: For detailed instructions please view the Magicycle Deer assembly video.
-Basic troubleshooting
1.Error code 30: Communication abnormality
or error code 30, it is an improper connection between the display and the controller-electric bike.
Please follow the video to check all corrosion damage and cable connection.
It would also help with the PAS doesn't work, and light can't be turned on issues. Most electric bike problems can be solved by unplugging the connectors and checking the pins to get them fixed.
2.My bike won't turn on?
A loose connection or a low charge may cause your bike to not turn on. Follow these steps to check that your battery is charged and properly connected.
1) Press the power button
Press the on/off switch for 3s on the left handlebar to turn on the display.

2) Checking your battery
- Be sure to charge your battery until the 3 lights on your charger turns green, depicting a full charge. It should be at least 4-6 hours.
- If the battery is connected to the charger but won’t charge, be sure there is a fan sound inside the charger when you charge. If not, please contact our support team with a picture of your battery’s serial number.
- Once the battery is fully charged, reinstall the battery and try to turn on the bike again.
- If the bike still doesn’t turn on, check the battery connections as per the following section
3) Checking the connections
Please check the cable connection of the display and the cable connections under the controller.
Plug the two pieces of each connection apart and make sure the pins are not bent, then plug them back.
And make sure the two arrows on each connection are pointing at each other.

If your Magicycle still doesn’t turn on, please contact our support team.
3.The bike starts suddenly/lose power suddenly?
The slow starting would solve the power is abrupt and aggressive when you kick in.
You can check the following video to adjust the setting of PAS sensitivity and slow starting settings.
4.How to reach the top 28mph speed?
There are some adjustments on the display that you need to do so that you can reach the top 28 mph speed.
1) Press the "+" and "-" buttons at the same time, then the setting page show up in the display.
2) Select the "Advanced" option and press the "i" button to open the advanced setting page.
3) Select the "Power Set" option, which determines how many levels the pedal assistance provides.
The default value is 0-7. Set it to 0-5 and then press the "i" button to save it.
After this, a small sub-page will come up showing the voltage percentage that is put on each level of pedal assistance. Select level 5 from 96% to 100%.
4) Hold the "i" button to save all the settings.
Now your bike can reach 28 mph when you pedal in assist 5.
(P.S. it's normal that the bike cannot reach 28 mph with throttle only.)


5.The bike is too powerful for me, what should I do?
You can adjust the settings on the display by the below guide to make your Magicycle less powerful.
1) Decrease the current limit

2) Decrease the power level of PAS in advanced settings

3) increase the level of sensitivity

4) Increase slow start

6.When powerd on the motor doesn't respond?
Possible causes:
- Loose wiring
- Loose or damaged throttle
- Loose or damaged motor plug wire
- Damaged motor
Please reconnect the motor plug wire, if the problem is not resolved, feel free to contact us: support_ca@magicyclebike.com
7.Reduced range
Possible causes:
- Low tire pressure
- Low or faulty battery
- Driving with too many hills, headwind, braking,
and/or excessive load
- Battery discharged for long period of time without
regular charges, aged or damaged
- Brakes rubbing
Most common solutions:
- Adjust tire pressure
- Check connections or charge battery
- Assist with pedals or adjust route
- Replace the battery
- Check the brakes
8.Suspension unlocked
The Magicycle suspension adjustment video will be helpful.
9.Shifter handlebar installation instruction
If the shifter got broken during the delivery, here is the instruction of how to install your new shifter bar.
10.Loosen front fork
If the front fork is loose, follow the adjustment video to fix it.
11.Magicycle fat tire changing guide
12.Regular safety checks
It is highly recommended to do regular safety checks for your bike.
13.How to install the adjustable stem
14.How to remove rear wheel
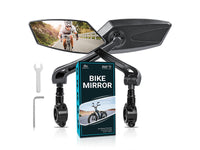
15.How to install the rearview mirrors on your Magicycle bikes
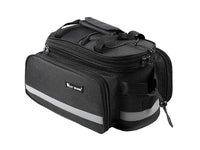
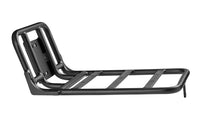
16.Magicycle front rack assembly instruction
17.Magicycle standard ocelot/Jaguarundi rear rack assembly instruction
-Battery troubleshooting
1.How to charge me Magicycle ebike?
1) Take the battery pack off using the key switch.
2) Remove the rubber cover on the charging socket on the opposite side of the battery switch.
3) With the battery on or off the bike, place the charger in a flat, secure place, and connect the DC output plug from the charger (round barrel connector) to the charging port on the side of the battery pack.
4) Then connect the input plug (110/220-volt plug) to the power outlet, charging should initiate and will be indicated by the LED charge status light on the charger turning red.
5) After the charging indicator light turning green, unplug the charger from the outlet first and proceed to remove the charger output plug from the bike charging port.


Always charge your battery in temperature between 10 and 26 degrees Celsius and ensure the battery and charger are not damaged before initiating charge. If you notice anything unusual while charging, please discontinue charging and using the bike and contact Magicycle Bike for help.
2.My battery seems to discharge way to soon, I only ride it 1 hours.
We're sorry that your battery is having some trouble! Before we look further into the matter, please do some checking to confirm the problem.
1) how long have you charged this battery? ( It should be at least 4-6 hours.)
2) Was there a fan sound inside the charger when you charged it?
3) Please take a photo of the charger light and the battery lights when they are charging.

4) Use a voltmeter to TEST the battery voltage and take a photo.


Please contact our support team with pics, we will check and help you quickly!
3.Is is normal for the battery indicater lights to be three blue/green and one red when charging? Is it fully charged, too?
One fact that has probably been confusing many customers is that 3 green/1red lights, instead of 4 green lights, indicate a full charge. Each light no matter red or green indicates around 25% charged. So when the 4 lights are all on, the battery has been fully charged. Then when you ride the bike after the full charge, as the remaining power becomes lower the lights will turn off one by one-- 3green/1red, 2green/1red, 1green/1red, and finally only 1 red. Only 1 red light indicates the remaining power is less than 25% and if you drain out the battery completely to 0%, the 1 red will turn off as well. In conclusion, with 4 lights on, no matter green or red, it indicates a full charge. The last one in red is designed to notice the rider that the remaining power is already lower than 25% and it's time to charge it now.
4.I cannot change my battery
If you experience any of the following three conditions, you may need to replace the battery:
1) The voltage is abnormal, press the battery button, there is no light on the battery or none of the four lights are on at the same time, so the bike cannot be turned on.

2) Only charging for 10 minutes, the charger light shows green, and it runs out of power after 15 minutes of riding.

3) The battery light is blinking and cannot be charged
5.Broken /craked battery case
There might be certain bulge on few batteries due to the rough transportation, and somehow it looks like the battery is cracked, however, in most cases, it is the decal that is cracked or peeled off.Here is an easy way to fix it.
6.Battery spark
Please do not worry, the sparking from the battery is normal. As long as the sparks aren't massive, don't come with smoke, and it only sparks when connections are made, there's nothing to worry about.
7.Where can I find the battery bar code and bike's serial number?
Battery bar code: at the bottom of the battery.

Serial Number/ identifying number
For the first generation,it behinds the crank, put the bike upside down

For the second generation, on the head tube under the "Magicycle logo"

-Display
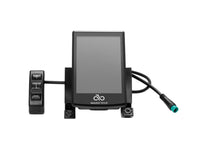
1.LCD display features
The LCD display shows details about your bike such as battery charge, speed, and more! This guide will walk you through the various features of the LCD display. Watch the video below to learn more about the LCD display features and how to use them!
Display Indication Cycle Interface

Setting Interface

2.Backlight display features
The backlight display shows details about your bike such as battery charge, speed, and more! This guide will walk you through the various features of the backlight display. Watch the video below to learn more about the backlight display features and how to use them!


3.How to turn on my Magicycle ebike?
Briefly press the power button to switch on the E-bike system. When display is on, hold the power button for 2s, the E-bike system will be switched off and no longer uses the battery power.
After switching on the E-bike system, the display will show real-time Speed and Trip Distance by default. Press the “i” button to switch between following elements:
* When parking the E-bike for more than 5 minutes, the E-bike system switches off automatically.
* When the E-bike is parked for a long time, please remove the battery and keep it properly

4.How to remove my display?
In this video below, you will be guided how to remove the display
Please click here.
5.How to see the voltage on the display?
You can simply change the display voltage mode easily!

SOC V represents 2 display modes of battery SOC. One is by the percent value and the other is by the Voltage value. Press the “ + ” button or the “ - ” button to choose the display method. The default view method is by the percent.
To change slow start up settings, press “ +/- ” button to choose the value. And press the i button to confirm and store a changed setting.

6.What's the password of my display? Can I reset it? If I forget my password, what should I do?
The default password is ‘1212’.
Power-on Password Disable/Enable
To enable or disable Start PassWord settings, press the “ + ” or the “ - ” button to select ON or OFF. ON means enabling a power-on password while OFF means disabling a power-on password. The default value is OFF.
To enable a power-on password, choose ON and press “ i ” button to confirm and input the current password or default password’1212’. Press the “ + ” or the “ - ” button to change the number and press the “ i ” button to confirm digits one by one until the correct password is completed.
To disable the current password, choose OFF and press “ i ” button to confirm and input the current password correctly. The screen displays ‘PassWord Canceled Successfully’. *Then the display password is restoring the default code ‘1212’.

Power-on Password Reset
Press the “ + ” or the “ - ” button to select ‘Reset PassWord’ and press the “ i ” button to confirm to access
power-on password reset interface. There are 3 pages for setting up a new password:
In the first page, please enter the current password or default password ‘1212’ correctly.
Then it moves to the second page for inputting a new password. Press the “ + ” or the “ - ” button to increase or decrease the number and then press the “ i ” button to confirm digits one by one until a new 4-digit password is completed.
Finally, it comes to the third page and reenter the new password again for confirmation. The screen displays, PassWord Reset Successfully,
When switching on the E-bike system next time, please enter the new password to power on the display.

Be sure to remember your display password, once you forget it, we cannot reset it for you, unfortunately you may need to replace a new display.
7.My display just arrived and I think it's cranked, what do I do?
The Full Color Display arrives with a concealed layer of protective packaging film. The packaging film is added protection for the screen during shipping and transit, as well as against minimal dirt and debris scuffs while riding should you decide to leave it in place.
If your display appears to have arrived scratched or cracked, please remove the protective film from the display. It can sometimes be difficult to lift and peel the protective film off, so exercise caution if using household tools to remove the film to avoid damaging the display.
If you've removed the protective film and there continues to be a cosmetic concern regarding your Full Color Display, please contact us.
8.Display inaccurate indication/when I pedal there is no power
For the inaccurate indication, please check the below guide to troubleshooting.
1) Check the voltage in the screen setting it should be 52V.

2) Speed sensor should be set as 1.

3) The cables on the bike should be as the video demonstrated.

The below pic demonstrates the PAS sensor sets in the right position.

9.Irregular Noises
Irregular noises from the motor can be caused by a variety of scenarios, whether something is going on internally inside the motor or the issue is purely external. If your ebike's motor is making unusual noises, the first step we recommend is checking the motor cable and the 10-core cable first, whether if there is any arced to cause this intermittent buzz reaction.
Please check the photos and video:
1) Motor cable


2) 10 Core cable ( make sure the arrows are facing each other when you reconnect them)
3) A rough video guide
10.Motor shut off or make noise when rider climbs at low speed or when rider starts with throttle on a slope
Please do not worry, it's a normal situation and the motor is not defective. On a slope, low speed or slow start might sometimes lead to the shut-off, which is actually protection designed to maintain the motor in great function. To avoid this, you can increase the speed when climibing and pedal a little when starting on a slope.
11.Speed sensor is not working or loosing
Please take the screw on the crank out first, then tighten the PAS sensor properly.

The below pic demonstrates the PAS sensor sets in the right position.

This sensor installation video maybe helpful
-Brake
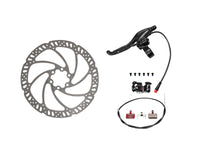
1.Error code 25: Brake Abnormality
Please unplug the brake pads, and check each brake, restart the bike.
The derailleur guard might press the whole part inside.
You can pull this part out, and make the chain straight in a line to the crankset.
And please adjust the front brake in the right position.
2.Hydraulic Break Leaking
We apologize for the leaking hydraulic brakes. The leaking problem is caused by the bubbles inside the oil case. Please refilling the fluid to the brakes as the video indicates.
3.How to Replace Brake Pad?
When Should I Replace My Brake Pads
A healthy brake pad material must be a minimum of 1 mm thick (the equivalent of 3 stacked business cards). Any thickness less is a sign for a replacement.
It isn't easy to spot contaminated brake pads with the naked eye. If your brakes squeal or squeak or your rotor appears to be a darker color with oil smears, it's a sign that your brake pads may be contaminated.
Please follow the video instruction
4.How to Install Tektro Brakes?
5.How to Install Tektro Hydraulic Brakes?
6.Brakes Noise
Noisy brakes can also be a telling sign that your ebike is in need of a check-up, repair, or even possibly needing replacement components. Excessive noise from your hydraulic disc brakes may signal that there is an issue with the rotor and brake pads. More specifically, that the brake pads and rotor have been contaminated from excessive lubrication or oil, causing the noise.
Before determining if that is the case, use rubbing alcohol and a clean, dry rag to wipe down your rotors. An intentional cleaning generally can make the excessive noise go away.
Please follow the below video to adjust
-Derailleur & Gear Shifter
1.Gear Shifting Information
The shifter on the right side of the handlebar controls the rear derailleur, which moves the chain from cog to cog, changing the way the bike rides.
In the illustration below, (1) is the motor, (2) is the freewheel, and (3) is the derailleur.

2.Derailleur and gear shifter indicate insistently
For the wrong indicator issue, please check the below video to adjust the shift bar and the derailleur according to the video and get it solved.
Adjust the 2 screws I circled in the below picture could adjust the gear shift alignment correctly. When you do that, also move the pedal to run the wheel to align them.

3.Gear shifter doesn't work
1) Please adjust the screw which circled in the below picture

It tightens or loosens sometimes would affect the derailleur.
2) Please check if the gearing mechanism was bent during shipping
If the crash bar tubing that surrounds the gears was pushed in, you should pry it out to where it lined up with the chain. You may need a few bending maneuvers.
-Front light & Tailight
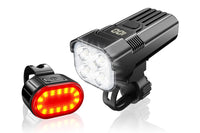
1.How to turn on the front light?
Simply hold the "+" button for 3 seconds to turn on the front light.

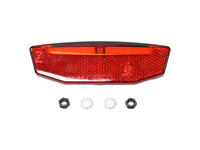
2.How install the taillight?
The taillight cable is in the controller box.


Just open the controller box and connect the cable.

3.Front light can't be turn on?
Here are the instructions for troubleshooting the issue front light.
1) Try to push the "+" button for 3 seconds to turn on the front light.
2) If it still doesn't work, we suggest you try to replug the cables in front of the handlebar.
Please follow this video to check the cables.
3) Please check the cable under the controller.
Please re-plug the cable under the controller too. Make sure the arrows are aligned.

4) Check the arrows and the cable under the controller, and test the voltage in the headlights with a voltmeter if it gets 6V.
4.Taillight Issue
1) Check the cable to the rear light is properly connected

2) The USB cable should as well as the other cables on this bike
3) Make sure the arrows are aligned


